General Principles
What the human eye ( or virtual camera ) sees is a result of light coming off of an object or other light source and striking receptors in the eye. In order to understand and model this process, it is necessary to understand different light sources and the ways that different materials reflect those light sources.Trying to recreate reality is difficult.
Lighting calculations can take a VERY long time.
The techniques described here are heuristics which produce appropriate results, but they do not work in the same way reality works - because that would take too long to compute, at least for interactive graphics.
Instead of just specifying a single colour for a ploygon we will instead specify the properties of the material that the polygon is supposed to be made out of, ( i.e. how the material responds to different kinds of light ), and the properties of the light or lights shining onto that material.
Illumination Models
No Lighting ( Emissive Lighting )- There are no lights in the scene
- Each polygon is self-luminous (it lights itself, but does
not give off light)
- This is also known as "emissive" lighting in some systems.
- ( Truly "no" lighting would be a totally black screen and not very interesting. )
- Emissive lighting can have some interesting effects, such as car headlights or neon signs.
- Each polygon has its own colour which is constant over its surface
- That colour is not affected by anything else in the world
- That colour is not affected by the position or orientation of the polygon in the world
- This is very fast, but not very realistic
- position of viewer is not important
- No 3-D information provided.
- Generally used as a special effect in combination with other lighting, or for very simple graphics.
I = Ki
I: intensity
Ki: object's intrinsic intensity, 0.0 - 1.0 for each of R, G, and B
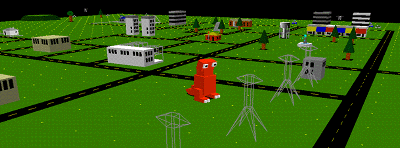
This scene from battalion has no lighting ( ? )
Ambient
- Non-directional light source
- Simulates light that has been reflected so many times from so many surfaces it appears to come equally from all directions
- intensity is constant over polygon's surface
- intensity is not affected by anything else in the world
- intensity is not affected by the position or orientation of the polygon in the world
- position of viewer is not important
- No 3-D information provided.
- Generally used as a base lighting in combination with other lights.
I: intensity
Ia: intensity of Ambient light
Ka: object's ambient reflection coefficient, 0.0 - 1.0 for each of R, G, and B
Types of Light Sources Which Can be Used to Light a Scene
- Directional light - produced by a light source an
infinite distance from the scene., All of the light rays emanating
from the light strike the polygons in the scene from a single
parallel direction, and with equal intensity everywhere.
- Sunlight is for all intents and purposes a directional light.
- Characterized by color, intensity, and direction.
- Point light - a light that gives off equal amounts
of light in all directions. Polygons, and parts of polygons which
are closer to the light appear brighter than those that are further
away. The angle at which light from a point light source hits
an object is a function of the positions of both the object and
the light source. The intensity of the light source hitting the
object is a function of the distance between them. Different
graphics programs may ( or may not ) allow the programmer to
adjust the falloff function in different ways.
- A bare bulb hanging from a cord is essentially a point light.
- Characterized by color, intensity, location, and falloff function.
- Spotlight - light that radiates light in a cone with
more light in the center of the cone, gradually tapering off
towards the sides of the cone. The simplest spotlight would just
be a point light that is restricted to a certain angle around
its primary axis of direction - Think of something like a flashlight
or car headlight as opposed to a bare bulb hanging on a wire.
More advanced spotlights have a falloff function making the light
more intense at the center of the cone and softer at the edges.
- Characterized as a point light, an axis of direction, a radius about that axis, and possibly a radial falloff function.
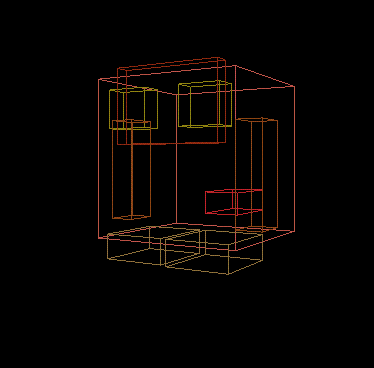
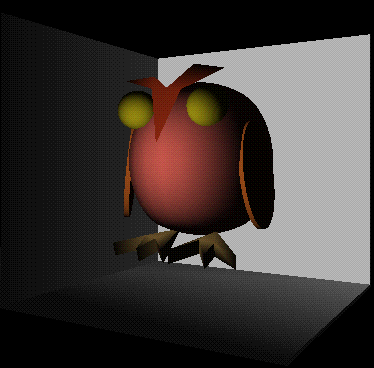
- bounding boxes of the components of the owl
self-luminous owl

directional light from the front of the owl
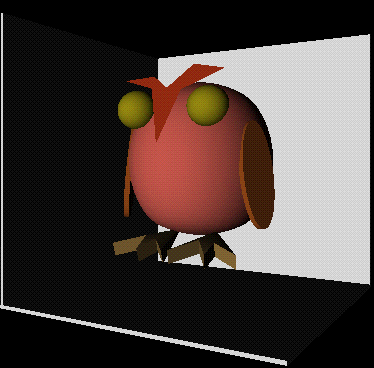
point light slightly in front of the owl
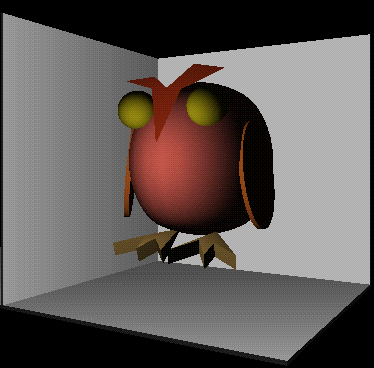
spotlight slightly in front of the owl aimed at the owl
Diffuse Reflection (Lambertian Reflection) Using a point light:
- comes from a specific direction
- reflects off of dull surfaces
- light reflected with equal intensity in all directions
- brightness depends on theta - angle between surface normal (N) and the direction to the light source (L)
- position of viewer is not important
I = Ip Kd cos(theta) or I = Ip Kd(N' * L')
I: intensity
Ip: intensity of point light
Kd: object's diffuse reflection reflection coefficient, 0.0 - 1.0 for each of R, G, and B
N': normalized surface normal
L': normalized direction to light source
*: represents the dot product of the two vectors
- theta is constant
- L' is constant
It is rare that we have an object in the real world illuminated only by a single light. Even on a dark night there is a some ambient light. To make sure all sides of an object get at least a little light we add some ambient light to the point or directional light:
I = Ia Ka + Ip Kd(N' * L')
Currently there is no distinction made between an object close to a point light and an object far away from that light. Only the angle has been used so far. It helps to introduce a term based on distance from the light. So we add in a light source attenuation factor: Fatt.
I = Ia Ka + Fatt Ip Kd(N' * L')
Coming up with an appropriate value for Fatt is rather tricky.
It can take a fair amount of time to balance all the various types of lights in a scene to give the desired effect (just as it takes a fair amount of time in real life to set up proper lighting)
Specular Reflection
- reflection off of shiny surfaces - you see a highlight
- shiny metal or plastic has high specular component
- chalk or carpet has very low specular component
- position of the viewer IS important in specular reflection
I: intensity
Ip: intensity of point light
n: specular-reflection exponent (higher is sharper falloff)
W: gives specular component of non-specular materials
- So if we put all the lighting models depending on light together
we add up their various components to get:
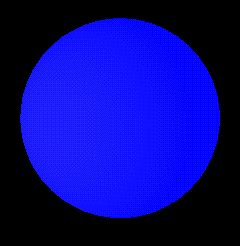
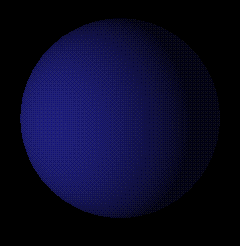
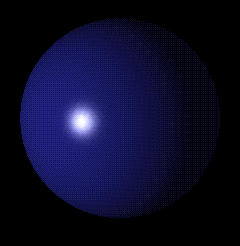
I = Ia Ka + Ip Kd(N' * L') + Ip cos^n(a) W(theta)
As shown in the following figures:
 +
+  +
+  =
= 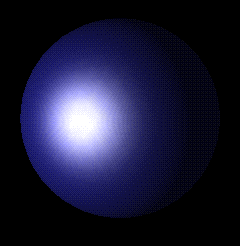
Ambient + Diffuse + Specular = ResultIn OpenGL a polygon can have the following material properties:
- ambientColor (R, G, B) - Contribution due to ambient light
- diffuseColor (R, G, B) - Contribution due to directed, point, and spot lights
- specularColor (R, G, B) - Contribution due to specularity, usually white
- emissiveColor (R, G, B) - For objects that glow of their own accord, independent of light
- transparency 0.0 - 1.0 - Alpha channel, for combining with pixels behind the object.
- shininess 0.0 - 1.0 - Controls the contribution of the specular component
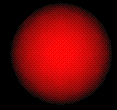
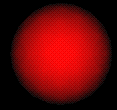
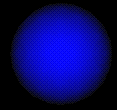
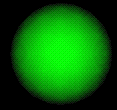
The following pictures will help to illustrate this:
| ball | light |
|
| white | red |
|
| red | white |
|
| red | green |

|
| purple | blue |
|
| yellow | aqua |
|
One important thing to note about all of the above equations is that each object is dealt with separately. That is, one object does not block light from reaching another object. The creation of realistic shadows is quite expensive if done right, and is a currently active area of research in computer graphics. ( Consider, for example, a plant with many leaves, each of which could cast shadows on other leaves or on the other nearby objects, and then further consider the leaves fluttering in the breeze and lit by diffuse or unusual light sources. )
Multiple Lights
With multiple lights the affect of all the lights are additive.Shading Models
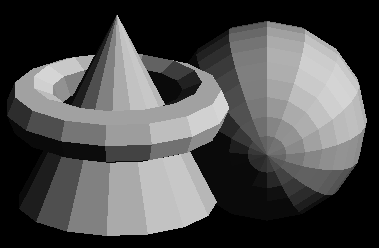
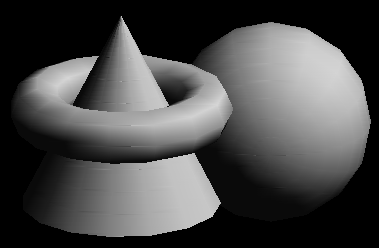
We often use polygons to simulate curved surfaces. If these cases we want the colours of the polygons to flow smoothly into each other.- flat shading
- goraud shading ( color interpolation shading )
- phong shading ( normal interpolation shading )
- each entire polygon is drawn with the same colour
- need to know one normal for the entire polygon
- fast
- lighting equation used once per polygon
Here is another of the OpenGL samples with a flat shaded scene:
Goraud Shading
- colours are interpolated across the polygon
- need to know a normal for each vertex of the polygon
- slower than flat shading
- lighting equation used at each vertex
Here is another of the OpenGL samples with a smooth shaded scene:
Phong Shading
- normals are interpolated across the polygon
- need to know a normal for each vertex of the polygon
- better at dealing with highlights than Goraud shading
- slower than Goraud shading
- lighting equation used at each pixel
Whether we are interpolating normals or colours the procedure is the same:
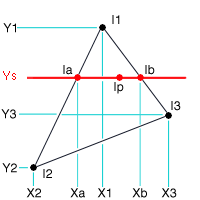
To find the intensity of Ip, we need to know the intensity of Ia and Ib. To find the intensity of Ia we need to know the intensity of I1 and I2. To find the intensity of Ib we need to know the intensity of I1 and I3.
Ia = (Ys - Y2) / (Y1 - Y2) * I1 + (Y1 - Ys) / (Y1 - Y2) * I2
Ib = (Ys - Y3) / (Y1 - Y3) * I1 + (Y1 - Ys) / (Y1 - Y3) * I3
Ip = (Xb - Xp) / (Xb - Xa) * Ia + (Xp - Xa) / (Xb - Xa) * Ib
Fog We talked earlier about how atmospheric affects give us a sense of depth as particles in the air make objects that are further away look less distinct than near objects.
Fog, or atmospheric attenuation allows us to simulate this affect.
Fog is implemented by blending the calculated color of a pixel with a given background color ( usually grey or black ), in a mixing ratio that is somehow proportional to the distance between the camera and the object. Objects that are farther away get a greater fraction of the background color relative to the object's color, and hence "fade away" into the background. In this sense, fog can ( sort of ) be thought of as a shading effect.
Fog is typically given a starting distance, an ending distance, and a colour. The fog begins at the starting distance and all the colours slowly transition to the fog colour towards the ending distance. At the ending distance all colours are the fog colour.
Here are those o-so-everpresent computer graphics teapots from the OpenGL samples:

To use fog in OpenGL you need to tell the computer a few things:
- color of the fog as R, G, and B values
- function for how to map the intermediate distances (linear, exponential, exponential squared
- where the fog begins and where the fog ends if using linear mapping
- density of the fog if using one of the two exponentials mappings
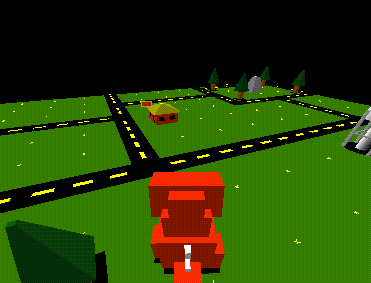
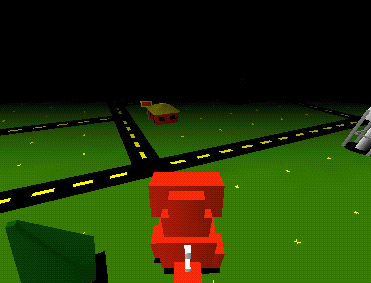
Here is the same scene with fog. The monster sees a much softer horizon as objects further away tend towards the black colour of the sky
AntiAliasing Lines and the edges of polygons still look jagged at this point. This is especially noticable when moving through a static scene looking at sharp edges.
This is known as aliasing, and is caused by the conversion from the mathematical edge to a discrete set of pixels. We saw near the beginning of the course how to scan convert a line into the frame buffer, but at that point we only dealth with placing the pixel or not placing the pixel. Now we will deal with coverage.
The mathematical line will likely not exactly cover pixel boundaries - some pixels will be mostly covered by the line (or edge), and others only slightly. Instead of making a yes/no decision we can assign a value to this coverage (from say 0 to 1) for each pixel and then use these values to blend the colour of the line (or edge) with the existing contents of the frame buffer.
In OpenGL you give hints setting the hints for GL_POINT_SMOOTH_HINT, GL_LINE_SMOOTH_HINT, GL_POLYGON_SMOOTH_HINT to tell OpenGL to be GL_FASTEST or GL_NICEST to try and smooth things out using the alpha (transparency) values.
You also need to enable or disable that smoothing
glEnable(GL_POINT_SMOOTH);
glEnable(GL_LINE_SMOOTH);
glEnable(GL_POLYGON_SMOOTH);
No comments:
Post a Comment